- |
Last month the CED team, along with 4 other talented local designers, were honoured to be part of the “Designing the Magic of Christmas” tree event at Parkwood Estate in Oshawa. To kick start their holiday tours, we were asked to decorate their Christmas trees in one of five charming rooms.

Michelle Peer, Orsi Panos, Nella Deluca, Christine Elliott, Susan Carducci
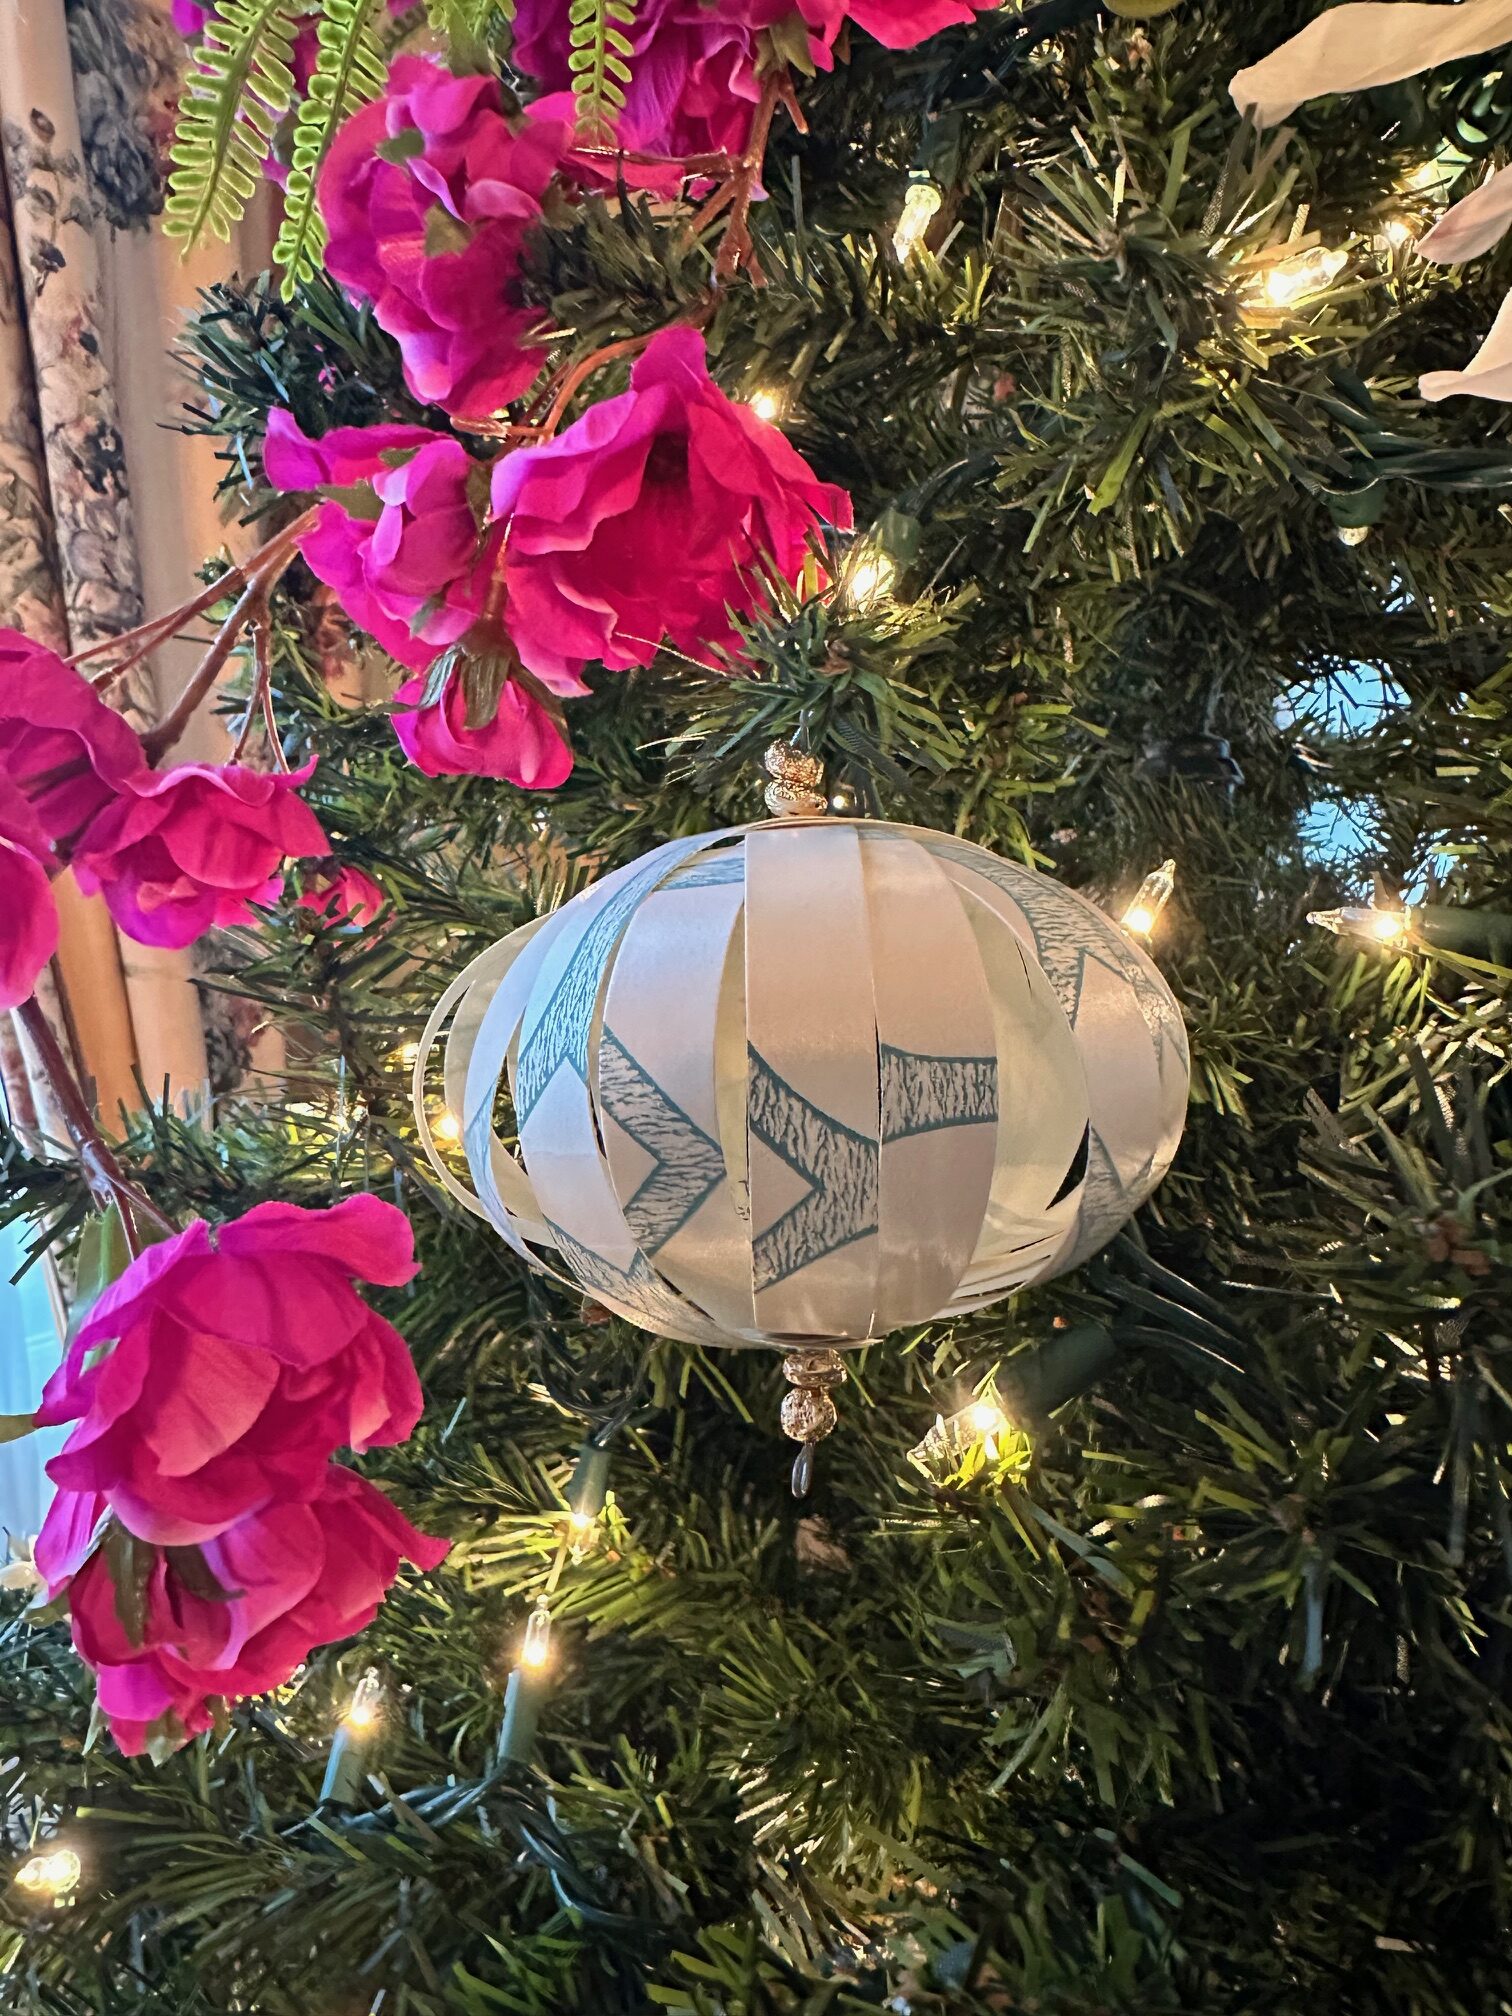
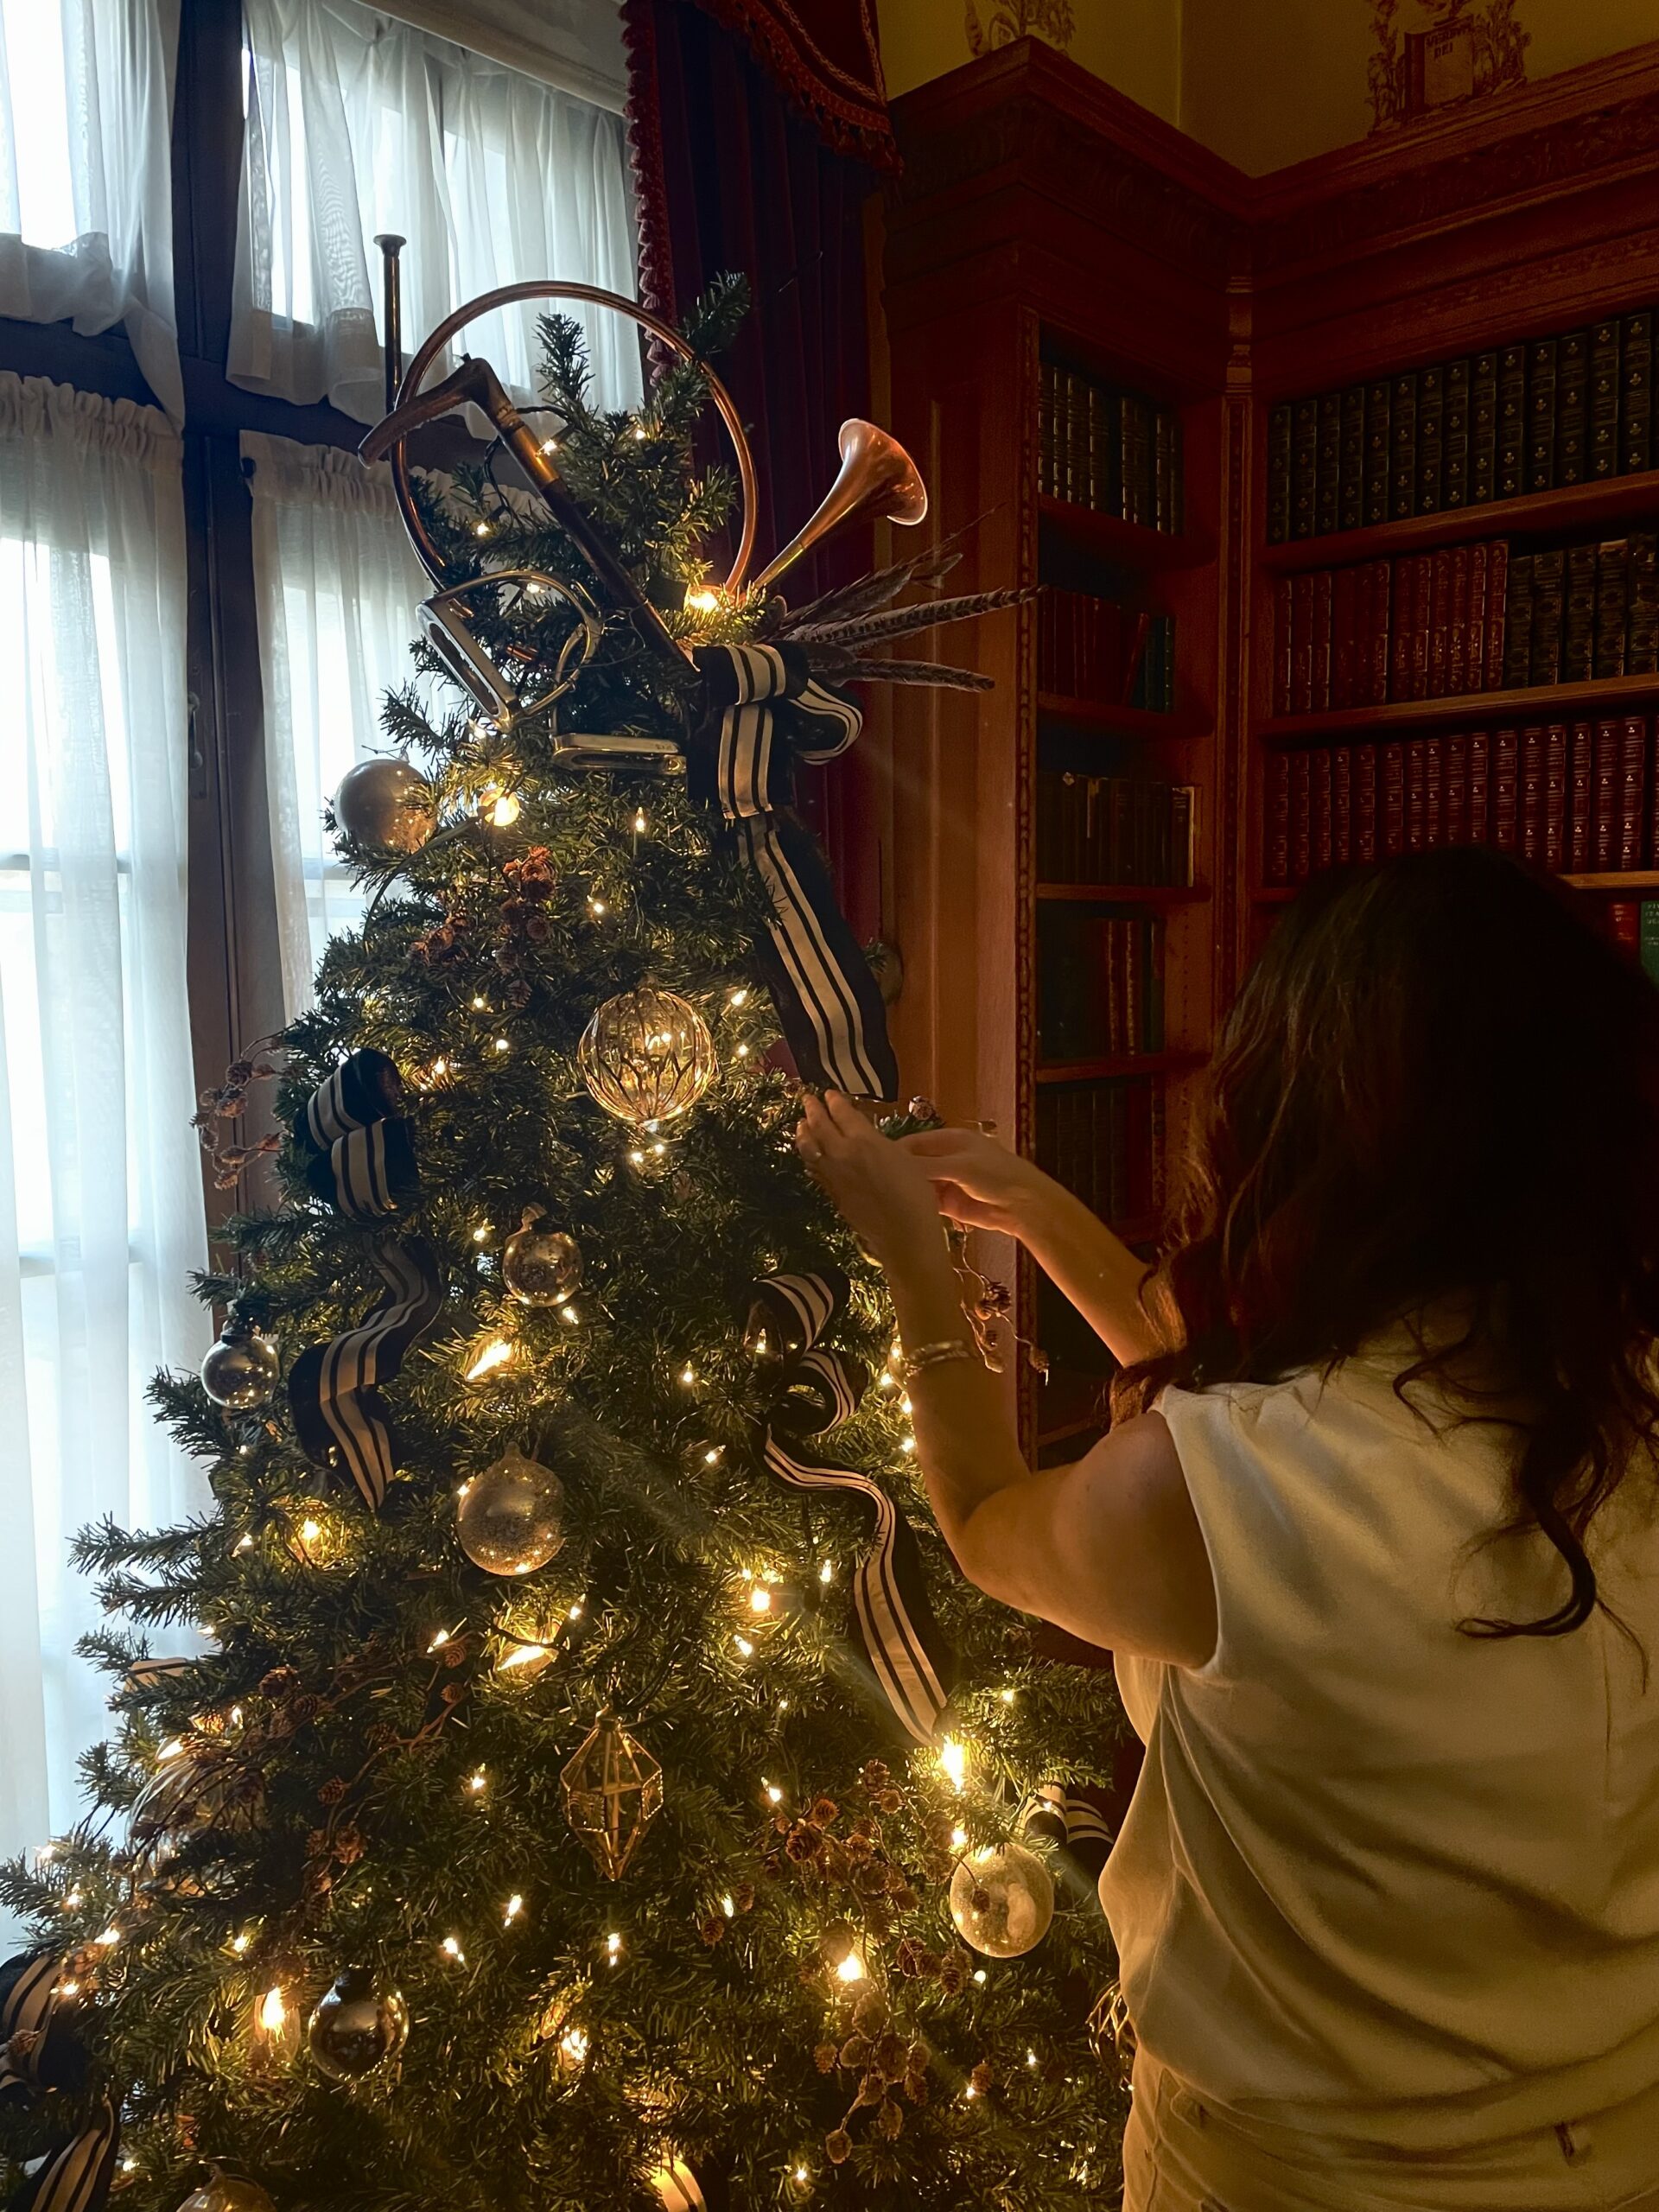
Located across the Sun Room, we decided to choose the library because of its warmth due to the beautiful wooden shelves that are filled with antique books. At night, the whole room comes to life with accent lighting above the bookcase showcasing the incredible hand painted designs around the room near the ceiling. If you have never been to Parkwood, a night tour is a definite must!
For our tree, we chose an equestrian theme because Samuel Mclaughlin’s daughters loved to ride. The family won 2 Kings Plates and also built Parkwood Stables, which is now Windfields Farms. Our tree was decorated beautifully with equestrian elements along with handcrafted tags using old photos of the Mclaughlin family riding and a letter from Samuel to his daughters to tie into our theme.

Since the tour has opened to the public, we had numerous inquiries about how we made our unique tag ornament. We decided to share how you can make these tags at home with just a few easy to get items from your local crafts store.

What you will need:
40 pack of cardstock cards – these will yield 80 tags
Modge Podge– size will depend on how many cards you are doing
Small container (for Modge Podge)
Decorative tape– optional
Ribbon – optional
Scissors
Single- hole punch
Out of each card you can cut out two tags approx 3.75” W x 6.5 ”H. To make this part easier, we used a paper trimmer similar to this. Then we cut the top corners on an angle to create a gift tag appearance.
Once you have your tag shape cut out, it’s time to let your creativity shine! Personalize each tag by adding festive designs, messages, and photographs. You can choose to write holiday greetings, draw intricate Christmas scenes, or print out family photos to attach to the tags. The possibilities are endless!
For ours, we used black and white laser printouts of photos. We made sure they were the right size using photoshop but you could also use Cava or for smaller photos enlarge them on a scanner or photocopier then print.
The next step is to pour the Modge Podge into a small container and use a foam brush to cover the entire front of the tag. Applied the image to the tag, then painted the entire front of the tag again with the modge podge, making sure it’s a thick coat. Don’t worry if it looks foggy- it will dry clear. Set your tags aside for a couple of hours, then weigh them down overnight with something heavy- we used books. It’s recommended that you use parchment paper between the books and the tags to ensure they don’t stick together!
The next day use the hole puncher to create a hole at the top of each one. This is where you will thread the ribbon or twine to hang the ornaments.. And voila you have your new beautiful homemade tag ornaments for your tree! And if you really want to make them extra special, repeat the process on the back side too!

Happy Holidays!
C.
A special thank you to Theresa Thompson, our wonderful Mary Street client, for loaning the ornaments for our tree this year! She is also the mastermind behind the creation of our beautiful tags!
Similar Blogs
- |
- |
- |

CED Favourites: Wallpaper
Parkwood Estate: Deck the Halls
Designing with Convenience in Mind

Mary Street - Having the right team.
Mary Street - An unexpected room.
Mary Street - Hello Summer!

Mary Street - A room designed for entertaining
Mary Street - The project I almost didn't take.
Parkwood Estate: Designing the Magic of Christmas

Pendant Lighting : Not just for kitchens anymore.

Like, Love, Share. A little bit of Everything.